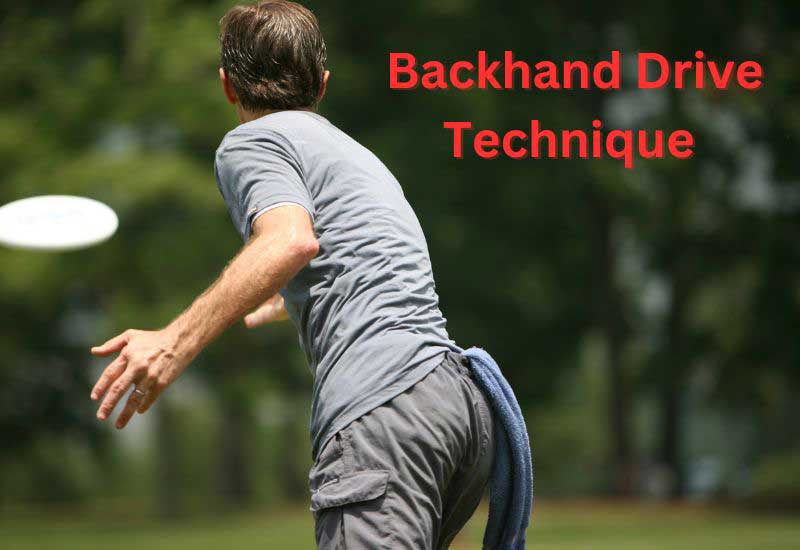
A crucial skill in disc golf that most beginners focus on is the backhand drive. Heck, even a Grandma, who’s never thrown in her life before, automatically adopts a backhand drive stance when she comes across a frisbee on the beach. Unless she’s a natural, its hard to do just right without a lot of game time.
This shot is the most common and powerful shot you can use to eek out long distances on the fairways. To really pull it off, understanding the mechanics behind power generation and form is critical. To really refine your backhand drive, practice a crap load of drills, and pay particular attention to your grip, stance, and hone in on the weight transfer that happens during your hip swivels. Keep your shoulders relaxed, well more of a relaxed tension, so they can rotate and whip the power out as you drive with your hip rotation.

Effective form is foundational to maximizing the distance and accuracy you can get from your backhand drive. It looks simple, and in some ways it is, but it involves a series of coordinated movements that start from the ground up, channeling power from your legs and hips, and transferring it through your midsection and then through your arm to the disc. Proper form not only improves the power behind your throw but also reduces the risk of injury. Paying attention to the angle and speed of release will help you control the disc’s flight path.
Like everything, practice makes perfect. Mastering the backhand drive in disc golf requires patience. To speed up your progress grab a net or a park and just drill backhands. Record your form on your phone and analyze and adjust your technique accordingly. This will speed up your progress and lead to less frustration when you get into competitive games. Regular drilling sessions lead to more consistent and powerful drives. By studying your own form and seeking feedback from more experienced players, you can identify areas for improvement.
Everybody needs a mentor, so if you can hook up with someone who’s got some skin in the game, it will only lead to your betterment. No school, like the school of experience. And one tip about power and maximizing distance – don’t get too hung up on this because without control and proper technique, you’ll lose accuracy and leak power, and maybe even get a repetitive strain injury, and stress upon stress. Focusing on power won’t translate to better scoring on the course until you can actually harness it to your advantage.
Fundamentals of Backhand Drive
Mastering the backhand drive is crucial if you want to elevate your game. It involves a mix of proper grip, form, and an understanding of disc angles won’t hurt neither.
Importance of Proper Grip
The grip is where your control over the disc begins. For a backhand throw, your thumb should rest on top of the disc, while the rest of your fingers are underneath the disc’s rim. The most common grips are the power grip for distance, and the fan grip which offers more control.
- Power Grip: All four fingers are tucked tightly against the rim, thumb on top, applying pressure with the fingertips.
- Fan Grip: Fingers are spread out like a fan beneath the disc, thumb on top, allowing for more finesse shots.
Try to develop good form on your grip, whichever style you choose, and then you’ll develop a reliable disc release, which is a key ingredient for an accurate throw.
Developing Good Form
Here’s a streamlined checklist for making your motion flow.
- Stance: Stand with your shoulder width apart, body sideways to the target.
- Footwork: Use a controlled X-step to build momentum, leading with your heel.
- Reach Back: Fully extend your throwing arm away from the target to maximize power.
- Pull-Through: Bring the disc close to your chest, then snap it forward with your elbow leading. (See next section for release angles).
- Follow-Through: Continue the movement of your arm and body even after releasing the disc to reduce stress on joints and increase distance.
Proper footwork and full-body follow-through are key to boosting power without overexertion.
Understanding Disc Angles
The angle at which you release the disc significantly impacts its flight path. You must familiarize yourself with these three primary angles:
- Flat: A disc released with its plane parallel to the ground tends to fly straight, depending on its design and wind conditions.
- Hyzer: Tilt the disc’s edge closest to you downward to achieve a leftward curve for right-handed throwers (and vice versa).
- Anhyzer: Tilt the disc’s edge closest to you upward for a gradual rightward curve for right-handed players (and again, vice versa).
Adjusting the release angle allows you to navigate around obstacles and compensate for varying wind conditions.
Backhand Technique In-Depth
Mastering the backhand drive is essential for any serious disc golfer. This technique requires coordinated movements and precise timing to achieve powerful, accurate throws.
Stance and Weight Transfer
If you want to get your form down, work on your stance first, as it sets your foundation, and we all know how vital they are in buildings. Well, at least you won’t have to bury into the ground, you’ll be planted on the tera firma, not under it, not least yet anyway, hopefully. Stepping away from life affirming morbidity and back to the throw, plant your feet shoulder-width apart, have the knees slightly bent, for optimal balance. As you rotate into the throw, shift your weight from your rear foot to your front foot (plant foot). If you want to get this throw mastered, fluid weight transfer is the key to generating enough power and maintaining your balance as your drive.
Arm Mechanics and follow-through
Hip whip generates the power, but your arm movement also determines the disc’s trajectory and speed. Keep your disc arm straight and pull it across your chest at mid-chest level, and be careful not to round your back. As you swing your arm forward, you can add some wrist snap at the end to pump a little extra speed and spin on the disc. You can lead with your elbow like Ricky in the above video, he has such a free flowing throwing style. The follow through is equally important; extend your arm completely and allow your body to naturally rotate towards the target. This will help you keep your balance and minimize repetitive strain type injuries.
- Straight Arm Pull-through: Pull your arm in a straight line across your chest.
- Wrist Snap: Develop some wrist snap to whip more spin on the disc.
- Follow Through: Completely follow through and keep your eyes on a sight in the distance where you want the disc to travel.
Using The X-Step for Momentum
Once again, you can start sideways or do what Sockibomb does in the video, face the target head on and then turn sideways at a right angle. But for newbs here’s the classic X-Step.
- Lead with your plant foot.
- Cross your other foot behind, forming an ‘X’ with your legs.
- As you uncross your legs, smoothly transition into the weight transfer and arm mechanics mentioned above.
This sequence needs to be practiced until it feels natural and you can perform it without losing balance, or rounding your back.
Coming Soon
Explode Your Disc golf Skills
- Drills To Improve Your Game
- Fitness & Power Tips To Give You The Edge
- Insider Secrets